How to Onboard a Virtual Assistant in Your First 30 Days
A good start decides whether a virtual assistant thrives. Use this 30-day plan to prepare access, teach your processes and build a reliable working rhythm.
In this article
You have chosen a person. Now the real work starts. How you onboard a virtual assistant in the first month shapes everything that follows: quality, trust and speed.
Many owners skip this stage because they are busy. That is exactly why they end up correcting the same mistakes for months. A short, structured plan avoids it.
Before day one: get ready
Preparation is the single best investment. Before your assistant starts, put these in place:
- Written instructions for the first workflow, even if they are rough.
- Tool access using unique logins and multi-factor authentication. Never share your own password.
- A contact list of who to ask about what.
- Sample tasks with the correct answers, so they can check their own work.
- A confidentiality agreement signed before any data is shared.
For the security side, see our guide to virtual assistant data security and confidentiality.
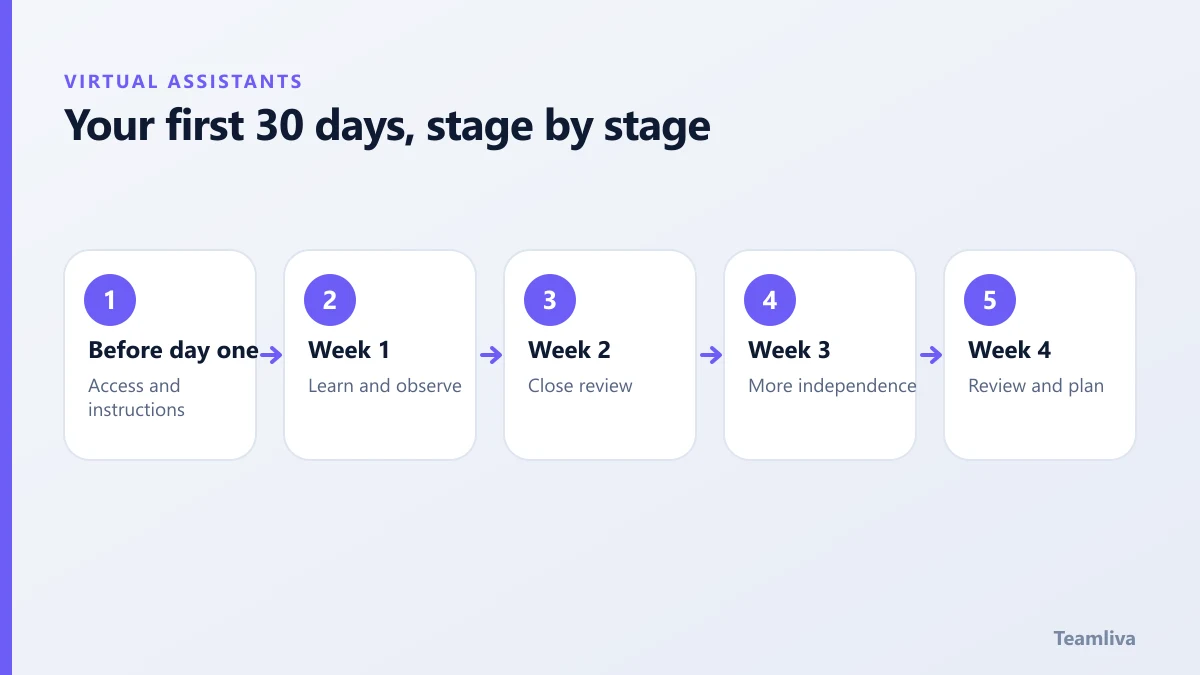
Week 1: Learn and observe
The goal is understanding, not speed.
- Hold a kickoff call to explain the business, your customers and your standards.
- Walk through the first workflow while sharing your screen.
- Ask the assistant to repeat the process back in their own words.
- Start with small tasks and review every result.
Encourage questions. A list of questions after day one is a good sign, not a bad one.

Week 2: Work with close review
The assistant now completes real tasks while you review them.
- Give feedback the same day where possible.
- Explain the reason behind each correction, not just the fix.
- Update your written instructions whenever a gap appears.
- Hold a short daily check-in, ideally 10 to 15 minutes.
Week 3: Increase independence
Move from reviewing everything to spot checks.
- Agree what the assistant can decide alone and what needs approval.
- Introduce a shared task list so progress is visible.
- Start tracking simple measures such as turnaround time and error rate.
Week 4: Review and plan
At the end of the month, sit down together and review:
- What is working well?
- Where did instructions cause confusion?
- Which tasks can now be handed over completely?
- Is the current number of hours right?
Then decide whether to add a second workflow. Our guide to managing a virtual assistant remotely covers how to keep the rhythm going.
Habits that help every stage
- Communicate in writing. It creates a record and reduces misunderstandings.
- Be specific. "Reply to customer emails by 10am using the templates" beats "handle support".
- Show, don't only tell. Short screen recordings are often clearer than documents.
- Be patient with the first month. Speed comes after accuracy.
A short checklist to onboard a virtual assistant
Print this or paste it into your task board.
- Confidentiality agreement signed.
- Individual logins created, multi-factor authentication on.
- Written instructions and sample tasks ready.
- Kickoff call booked, and a daily check-in scheduled for two weeks.
- A shared task board and one main chat channel agreed.
- Working hours, time zone overlap and holidays confirmed.
- Escalation contact named for urgent questions.
- A 30-day review date in the calendar.

What to do when things go wrong
Some bumps are normal. Handle them calmly.
- Repeated mistakes. Check the instructions first. Add an example of the correct result and a note on what to avoid.
- Slow progress. Ask what is blocking them. Missing access or unclear priorities are common causes.
- Poor communication. Agree specific response times and a clear place for questions.
- Mismatch of skills. If the role needs more than the person can offer, adjust the scope or the placement early rather than late.
For general guidance on hiring and managing people, the US Small Business Administration publishes useful material in its business guide.
Measuring the first month
Compare where you started with where you are. Useful measures include hours of your own time recovered, turnaround time on the delegated workflow, the number of corrections needed each week and how quickly questions are answered. A short written summary at the end of the month, agreed by both of you, keeps the relationship healthy and gives you a clear basis for the next step.
When onboarding is handled for you
If you work through a managed provider, part of this is done already. At Teamliva, professionals are assessed before placement and work with a named team lead who supports the transition. You can see how this works on our BPO and staffing solutions page.
If you have not chosen someone yet, start with our guide on how to hire a virtual assistant.
Sample first-week schedule
Here is a simple way to structure the opening days.
- Day one: kickoff call, tool access and a walkthrough of the first workflow.
- Day two: the assistant completes two or three small tasks while you review each one.
- Day three: feedback session and updates to the written instructions.
- Day four: slightly larger tasks with a short end-of-day summary.
- Day five: a review of the week, with questions and adjustments for the next.
Keep each check-in short and specific. The aim is steady confidence, not perfection on day one.

The takeaway
To onboard a virtual assistant well, prepare before day one, review closely in the early weeks and increase independence gradually. A month of structure pays back for years. To discuss your own onboarding needs, contact us.
Frequently asked questions
How long does it take to onboard a virtual assistant?
Expect around four weeks to reach a steady rhythm on one workflow. Simple tasks may settle sooner. Complex roles with many systems can take longer.
What should I prepare before day one?
Prepare written instructions, tool access with unique logins, a list of contacts, sample tasks with correct answers and a clear schedule for check-ins.
- #Teamliva
- #TeamLiva
- #VirtualAssistant
- #VirtualAssistantServices
- #HireAVirtualAssistant
- #Onboarding
- #RemoteTeams
- #Training